StarCraft 2: Squadron Tower Defense is a popular custom game mode that challenges players to build and optimize their defenses to survive increasingly difficult waves of enemies. Whether you're a seasoned veteran or a newcomer, understanding tower placement, synergy, and economy management is key to success. In this guide, we'll explore some advanced strategies to help you dominate the battlefield.
Front or Back: Where to Build?
One of the first decisions you'll face in Squadron Tower Defense is where to place your towers: towards the front or the back of the build area. Each choice has its advantages:
- Front Placement: Building towards the front allows you to earn minerals from kills sooner. You'll also know quickly if you've cleared the wave, enabling you to safely invest in more economy.
- Back Placement: Placing towers at the back forces enemy waves to travel further, giving your economy more time to generate resources. This small advantage adds up over multiple waves.
The choice ultimately depends on your strategy and the towers you have available. Experiment with both to find what works best for your playstyle.
The Tank Circling Trick
A clever trick to maximize your defense is to use a tank tower to control enemy movement. If you place a tank with 4+ spaces between it and your ranged DPS towers, melee enemies will often circle around the tank, allowing your ranged towers to deal damage safely. This strategy is particularly effective against waves with high melee unit counts.
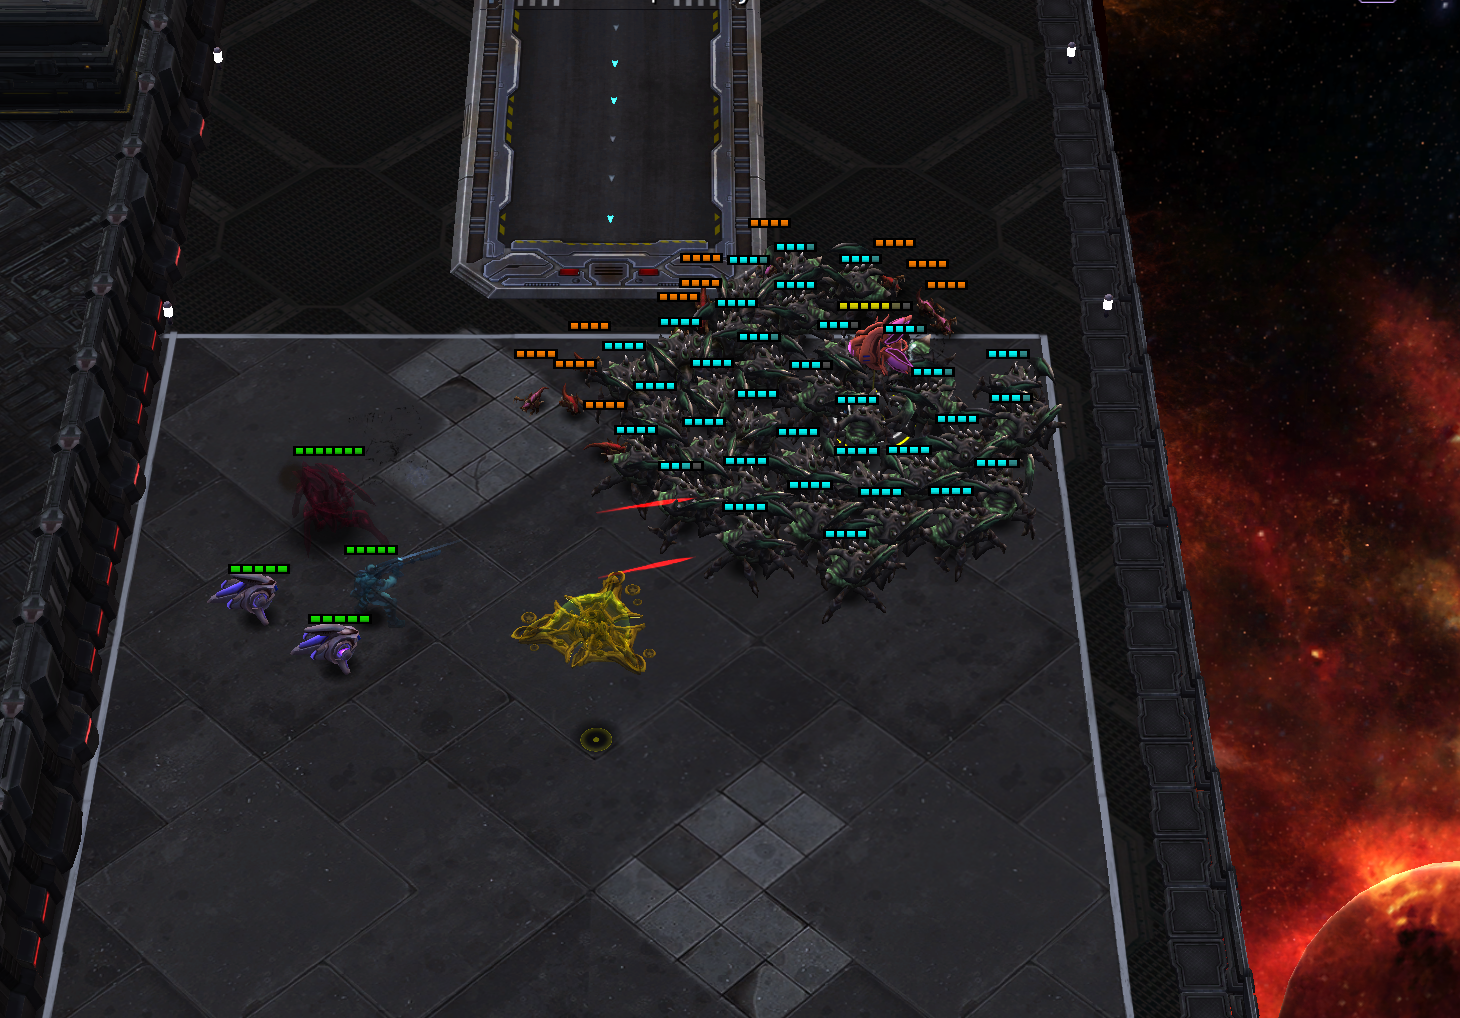 Example of wave units circling around a tank, with only a few units engaging at a time.
To optimize this setup, place slowing towers behind the tank and position your ranged DPS towers diagonally across from the tank. This ensures that enemies are slowed and funneled effectively.
Choosing the Right Towers
Selecting the right towers for each wave is crucial. Here are some general guidelines for key waves:
- Wave 4: Use towers like Thunderbird or a strong tank with DPS to handle this wave efficiently.
- Wave 5: A strong tank is essential to deal with Overlords, as they will circle around the tank, buying time for your DPS to eliminate them.
- Wave 10: The boss wave requires slowing towers (e.g., Nightcrawlers or Mudman) and high DPS ranged towers (e.g., Seraphim or Teeter) to take it down effectively.
Always consider the armor and damage types of incoming waves. For example, early-game units often have light armor, making them vulnerable to piercing damage on waves like 3, 5, and 7.
Early Game Tower and Send Strategies
The early game is critical for setting up a strong foundation for your defense. Here’s a breakdown of the strongest towers and aggressive sends for the current meta:
Strongest Early Game Towers
The effectiveness of towers depends on the wave's armor and attack type. Here’s a list of some of the strongest towers and their ideal waves:
- Phantom: Excellent for waves 2, 3, and 6. Be cautious on wave 4, as marines deal piercing damage, and Phantom’s light armor takes 130% damage. Pair it with a tank to mitigate this weakness.
- Harbinger/Grizzly/Daemon: Versatile tanks that are strong on waves 2 through 7. They provide consistent value and are generally useful throughout the early game.
- Dark Mage: If you have 1 or 2 DPS towers, adding a Dark Mage can be devastating due to its 30% attack speed buff.
- Runeguard: Especially powerful on wave 5 when surrounded by melee units, as its AOE damage detonation buff can clear waves effectively.
- Thunderbird: Universally strong for most waves due to its high DPS and AOE splash damage. Particularly effective on waves 2, 3, 4, 8, and 9.
- Adept: Provides strong Chaos damage at a low cost, making it ideal for waves 2, 3, 5, and 6. However, it requires a tank on waves 4, 5, and 7.
- Seraphim, Nightcrawlers, Carrion Spitters, and Mercurials: These towers excel on waves 9 and 10 but fall off quickly afterward.
- Void Smasher: A strong unupgraded unit that performs well in the current meta.
- Pulverizer: Deals enormous damage on early waves (1, 2, 3, 5, and 6) but is weak on waves 4, 7, and 8.
- Teeter: Extremely strong for waves 9, 10, and 11, and even stronger when upgraded for wave 12+. However, it can be weak on wave 13 without additional tanks.
Best Aggressive Sends for Early Game Waves
Aggressive sends can disrupt your opponent’s economy and defense. Here’s a guide to the best sends for each wave, considering gas capacity:
- Wave 1: Marine
- Wave 2: Titan Strider or Marauder
- Wave 3: Marauder
- Wave 4: Goliath or marine spam
- Wave 5: Immortal + Goliath
- Wave 6: Immortal + Goliath or potentially a tank (though it’s expensive at 200 gas)
- Wave 7: Tanks
- Wave 8: Queen + Hydra + Goliath
- Wave 9: Tanks + Basher
- Wave 10: Tanks
- Wave 11: Auras (Basher, Immortal, Goliath) + Tanks
- Wave 12: Wrathwalkers + Goliath
- Wave 13: Hellions, Feederling, Goliath, Immortal
- Wave 14: Either Auras or Banshee (Thor is often too expensive due to gas cap)
- Wave 17: Thors + Auras
- Wave 20: Hunterlings and Probes (to remove stuns and blinds from Fattys so they can deal massive damage)
General Early Game Advice
- Over-build for Leavers: If you’re down 2 or 3 players due to leavers, over-build slightly. Sends will be stronger since they’re divided among fewer players on your team.
- Build Cheap Towers Early: In dynamic game modes, build cheap towers as they become available and upgrade them at the right time. For example, grab a Specter or Cherub early and wait until rounds 9 or 10 to upgrade them into Mercurials or Seraphims.
- Economy is Exponential: Prioritize workers and speed upgrades early to maximize gas income over time. Playing a bit greedy early can pay off if you have the right towers to hold waves. However, always be prepared for potential aggressive sends from opponents.
Economy Management
Balancing your economy and tower choice is a delicate art. Early-game greed can pay off, but leaking waves is never worth it. Focus on building strong, cost-effective towers that remain relevant for multiple waves, such as Thunderbird or Mudman. These towers allow you to invest in your economy while maintaining a solid defense.
Remember, the tick rate of your economy means that earlier investments yield greater returns over time. However, don't sacrifice your defense for short-term gains. A well-timed tower upgrade or tower purchase can secure your hold and allow for more aggressive eco plays later.
Tower Synergy and Combos
Combining towers with complementary abilities is one of the most powerful strategies in Squadron Tower Defense. Here are some examples of effective synergies:
- High AOE DPS + Buffs: Pair a high AOE DPS tower like Dragon Aspect or Heisendonger with a Dark Mage for attack speed buffs and a Bone Overseer for lifesteal. This combo can shred through non-boss waves.
- Clef Buffs: Clefs provide +1 damage to nearby towers on each attack. Pair them with fast-attacking towers like Nightcrawlers, Captains, or Spectres for maximum effectiveness.
- Mass Buff Towers: Combine towers like Roach Champion (attack speed buff), Captain/Admiral (damage buff), and Clefs for a powerful, self-sustaining army.
Always think about how your towers can enhance each other. A well-coordinated team of towers can overcome even the toughest waves.
Final Thoughts
StarCraft 2: Squadron Tower Defense is a game of strategy, adaptability, and optimization. By mastering tower placement, understanding wave mechanics, and leveraging tower synergies, you can build an unstoppable defense. Remember to keep an eye on your economy and always plan ahead for the toughest waves.
Good luck, Commander!